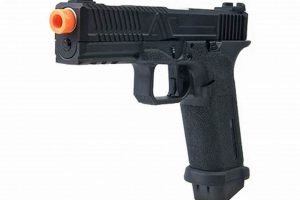
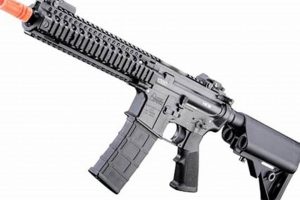
The installation of a device designed to illuminate tracer BBs on an airsoft rifle or pistol generally involves threading it onto the barrel. These units, which attach to the muzzle, utilize a UV light source to cause specially designed projectiles to glow in the dark, enhancing visibility during nighttime or low-light scenarios. The process typically requires ensuring the airsoft gun has a threaded outer barrel, then carefully screwing the unit on until it is securely fastened.
Employing such a device offers distinct advantages in airsoft gameplay. It dramatically improves the ability to track projectiles in flight, offering a tactical advantage in target acquisition and accuracy adjustment. Furthermore, the visual effect adds a layer of realism and excitement to skirmishes, especially in scenarios where identifying the source of fire is crucial. The use of illuminated projectiles has become increasingly common as players seek to enhance their overall experience and gain a competitive edge.
The following sections will provide detailed instructions on determining barrel compatibility, selecting the appropriate unit, and securely attaching it to various airsoft gun models, including addressing potential issues and maintenance considerations.
Tips for Tracer Unit Installation
The following tips offer guidance for successful installation and optimal performance of tracer units on airsoft guns.
Tip 1: Verify Barrel Thread Compatibility: Ensure the tracer unit and the airsoft gun’s outer barrel share compatible thread patterns (e.g., 14mm CCW). Incorrect threading can lead to damage or inability to attach the unit.
Tip 2: Clean Barrel Threads: Prior to installation, clean the outer barrel threads to remove any debris or residue. This ensures a secure and flush fit of the tracer unit.
Tip 3: Align Tracer Unit Correctly: When threading the unit onto the barrel, align it carefully to avoid cross-threading. Gently rotate it counter-clockwise until a click or slight drop is felt, indicating the threads are aligned. Then, tighten clockwise.
Tip 4: Avoid Over-Tightening: Over-tightening the tracer unit can damage the threads on either the unit or the barrel. Tighten until snug and secure, but avoid excessive force.
Tip 5: Test for Functionality: After installation, test the tracer unit with compatible tracer BBs. Verify that the unit illuminates the BBs effectively and that the projectiles fire without obstruction.
Tip 6: Check Battery Levels: Tracer units typically require batteries. Ensure that batteries are charged or replaced regularly to maintain optimal performance during gameplay.
Tip 7: Consider Unit Weight: Some tracer units can add considerable weight to the front of the airsoft gun. Account for this when selecting a unit and consider balancing the gun accordingly.
Adhering to these tips ensures proper installation, functionality, and longevity of the tracer unit, enhancing the airsoft experience.
The next section will discuss troubleshooting common issues encountered during the usage of tracer units.
1. Thread Compatibility Verification
The process of attaching an illuminating device to an airsoft weapon relies fundamentally on the congruence of threading between the device and the weapon’s barrel. This element, known as thread compatibility verification, constitutes a non-negotiable preliminary step. Disregarding this prerequisite can initiate a cascade of adverse outcomes, including equipment damage and functional failure. For example, attempting to force a 14mm clockwise-threaded tracer unit onto a barrel designed for 14mm counter-clockwise threading will invariably strip the threads, rendering both components unusable. The tracer unit’s intended effect is then negated, rendering the endeavor of installation pointless.
Furthermore, the significance of thread compatibility extends beyond simple mechanical attachment. A mismatched thread can lead to misalignment of the tracer unit relative to the bore axis. This misalignment results in projectiles contacting the inside of the unit, altering their trajectory and potentially damaging the internal components. The practical implication is a significant reduction in accuracy and consistency, undermining the tactical advantage the tracer unit is intended to provide. A consistent issue would be seen with cheaper airsoft guns, with lower quality and loose standards, which can cause for tracer units not to fit, damaging either the thread on the barrel or the tracer unit itself.
In summary, thread compatibility verification is not merely a procedural formality; it is an indispensable step that prevents damage, ensures proper function, and preserves the integrity of both the airsoft gun and the tracer unit. By diligently confirming thread compatibility, users avoid potential complications and maximize the effectiveness of their equipment, linking directly to overall function of “how to put a tracer unit on an airsoft gun”.
2. Secure Unit Attachment
Secure unit attachment is a critical component of “how to put a tracer unit on an airsoft gun” and directly impacts its operational effectiveness. The act of correctly affixing the tracer unit to the airsoft gun’s barrel ensures that the device remains firmly in place during gameplay, preventing disruption of the projectile’s trajectory and maintaining a consistent stream of illuminated tracer rounds. A loose or improperly attached unit can detach during rapid firing or maneuvering, leading to inaccurate shots, damage to the unit itself, and a potential disadvantage in skirmishes. For example, a tracer unit secured only by a few partially engaged threads is prone to vibrational loosening, particularly with higher rates of fire, resulting in erratic shot patterns and eventual detachment.
The implications of secure attachment extend beyond simple physical stability. A well-secured unit maintains consistent alignment with the airsoft gun’s barrel, ensuring that the emitted light effectively illuminates the tracer BBs as they exit the muzzle. Misalignment, resulting from an insecure attachment, can cause the light to miss the BBs, rendering the tracer function ineffective. Furthermore, a secure attachment prevents debris and moisture from entering the unit, protecting its internal components from damage and corrosion. Consider a scenario where an unsecured unit allows dirt and grime to accumulate between the threads and the barrel, leading to accelerated wear and potential malfunction.
In summary, secure unit attachment is not merely a step in “how to put a tracer unit on an airsoft gun,” but a crucial determinant of its performance, reliability, and longevity. Proper attention to detail during this phase, including verifying thread engagement, using appropriate tightening techniques, and periodically checking for looseness, ensures that the tracer unit functions as intended, providing a tangible advantage in low-light airsoft scenarios.
3. Battery Installation
Battery installation is intrinsically linked to the procedure of how to put a tracer unit on an airsoft gun, serving as an indispensable step in enabling the device’s functionality. Without proper battery installation, the tracer unit remains inoperable, rendering the efforts of physical attachment inconsequential. The energy source powers the UV light responsible for illuminating tracer BBs, creating the intended visual effect.
- Battery Type Compatibility
The tracer unit’s operational requirements dictate a specific battery type, voltage, and polarity. Incorrect battery selection can lead to malfunction or permanent damage to the unit’s internal circuitry. Manufacturers typically specify compatible battery types within the product documentation. For instance, attempting to power a unit designed for a 3.7V Li-ion battery with a 9V alkaline battery will likely result in immediate failure. Moreover, the physical dimensions of the battery must align with the unit’s battery compartment to ensure proper contact and secure fit, directly impacting “how to put a tracer unit on an airsoft gun” and its effective utilization.
- Polarity Alignment
Correct battery polarity alignment (+/-) is crucial for the tracer unit to function as designed. Reversing the polarity can damage the unit’s internal electronics or prevent it from powering on. Most units feature clear markings indicating the correct orientation for the battery terminals. Ignoring these markings risks irreversible damage. An example scenario: the tracer unit can be correctly secured to the barrel and have the right battery type installed, but placed in reverse, therefore the action of “how to put a tracer unit on an airsoft gun” is unfulfilled because the unit is nonfunctional.
- Battery Compartment Security
The battery compartment must be securely closed after installation to maintain electrical contact and prevent the battery from dislodging during operation. A loose or improperly secured compartment can cause intermittent power disruptions, leading to inconsistent illumination of tracer BBs. Many tracer units employ a screw-on cap or a hinged door with a latch to ensure secure closure. An unsecured compartment jeopardizes the effectiveness of the “how to put a tracer unit on an airsoft gun” process by leading to erratic functionality or outright failure.
- Battery Charge Level
The battery’s charge level directly impacts the intensity and duration of the UV light emitted by the tracer unit. A low battery charge can result in dim illumination, reducing the visibility of tracer BBs, especially in well-lit environments. Regular battery replacement or recharging is essential to maintain optimal performance. Using a battery with insufficient charge will cause a failure of “how to put a tracer unit on an airsoft gun” actions by failing to illuminate the tracer BBs.
Therefore, meticulous attention to battery installation is integral to the successful implementation of a tracer unit on an airsoft gun. Battery considerations are fundamental to the “how to put a tracer unit on an airsoft gun” process. Compliance with manufacturer specifications, proper polarity alignment, secure compartment closure, and maintaining adequate charge levels are all necessary elements. This combination ensures that the unit functions reliably and provides the intended performance benefits in low-light airsoft scenarios.
4. Operational Testing
Operational testing is an indispensable step following the physical attachment of a tracer unit to an airsoft gun. It is the validation phase that determines whether the tracer unit functions as intended after its installation. The results of operational testing directly reflect the success of the efforts invested in securing, aligning, and powering the unit. Without this assessment, the assumption of functionality remains unverified, potentially leading to tactical disadvantages during gameplay. Operational testing forms the bridge between theoretical installation and practical application.
- Verification of Illumination
This facet involves confirming that the tracer unit correctly illuminates tracer BBs as they are fired from the airsoft gun. The absence of illumination indicates a problem with either the battery, the unit’s internal circuitry, or the alignment of the light source with the BB path. For instance, if tracer rounds are fired in complete darkness and no visible glow is observed, it suggests a failure in the unit’s primary function. Successful illumination confirms the basic operability of the unit following the “how to put a tracer unit on an airsoft gun” process.
- Assessment of Projectile Trajectory
Operational testing should include evaluating whether the tracer unit alters the trajectory of the BBs. A correctly installed unit should not negatively impact accuracy or range. If BBs deviate significantly from their expected flight path after installing the unit, it suggests misalignment or obstruction within the unit. An instance would be if shots curve sharply to the left or right, indicating the unit’s muzzle is not aligned with the barrel. This trajectory assessment ensures that the “how to put a tracer unit on an airsoft gun” procedure has not compromised the weapon’s performance characteristics.
- Confirmation of Cycling Reliability
For automatic airsoft guns, operational testing includes ensuring that the tracer unit does not interfere with the weapon’s cycling mechanism. The added weight of the unit or internal obstructions can cause malfunctions such as jams or misfeeds. For example, a heavy tracer unit on a gas blowback pistol might reduce slide velocity, leading to inconsistent cycling. Successful cycling confirmation indicates that the “how to put a tracer unit on an airsoft gun” has not introduced any mechanical impediments to the weapon’s operation.
- Evaluation of Battery Performance
Operational testing provides an opportunity to assess the battery life of the tracer unit. The unit should maintain consistent illumination for a reasonable duration under typical gameplay conditions. A rapid decrease in brightness indicates a battery issue or excessive power consumption. For instance, a unit that only illuminates rounds brightly for a short burst before dimming suggests a weak battery or inefficient power management. Proper evaluation of battery performance affirms the “how to put a tracer unit on an airsoft gun” procedure’s sustainability during extended use.
In conclusion, operational testing serves as a critical validation step directly tied to how to put a tracer unit on an airsoft gun. By verifying illumination, assessing trajectory, confirming cycling reliability, and evaluating battery performance, users can determine whether the unit is functioning as intended and whether the installation process has been successful. This evaluation is essential for ensuring that the tracer unit provides the intended tactical advantage without compromising the weapon’s performance.
5. Proper Alignment
Proper alignment is a critical factor determining the successful implementation of how to put a tracer unit on an airsoft gun, profoundly affecting accuracy, consistency, and overall performance. A misaligned tracer unit introduces a range of problems, negating the benefits it’s intended to provide.
- Bore Axis Concordance
Bore axis concordance denotes the degree to which the tracer unit’s internal bore aligns with the airsoft gun’s barrel bore. Deviation from perfect alignment can cause the projectile to collide with the interior of the tracer unit upon exiting the barrel. This interaction introduces inconsistencies in projectile trajectory, diminishing accuracy and predictability. An example would be a tracer unit angled slightly downward; this would cause BBs to strike the bottom of the unit upon exit, leading to shots consistently landing low. Proper bore axis concordance ensures that projectiles exit the unit unimpeded, maintaining optimal flight characteristics following the installation process.
- Thread Engagement Uniformity
Thread engagement uniformity describes the even distribution of contact between the threads of the tracer unit and the airsoft gun’s barrel. Uneven thread engagement can lead to angular misalignment, exacerbating the issues related to bore axis concordance. Insufficient thread engagement on one side of the unit causes it to sit at an angle relative to the bore. This angle introduces a consistent bias to the projectile’s trajectory, making accurate shots increasingly difficult. The goal of “how to put a tracer unit on an airsoft gun” involves creating a solid connection and ensuring uniform thread engagement to prevent these misalignments.
- Centering Within Outer Barrel
Centering within the outer barrel describes how a tracer unit’s positioning inside an airsoft gun outer barrel allows for a balanced air flow in the interior. A lack of centered tracer unit in the center of the airsoft gun outer barrel can cause air disruption, causing BBs to impact the interior of the tracer unit which degrades accuracy of “how to put a tracer unit on an airsoft gun.”
- Light Source Trajectory Alignment
Light source trajectory alignment pertains to the precision with which the UV light emitted by the tracer unit illuminates the tracer BBs. Misalignment of the light source can result in incomplete or inconsistent illumination, reducing the visibility of the projectiles, particularly in bright environments. Imagine a unit where the UV light is angled slightly upwards; it might only illuminate the upper portion of the BB, creating a less visible and less effective tracer effect. An element of the how to put a tracer unit on an airsoft gun task includes verifying that the light source is optimally positioned to maximize the visibility of tracer rounds.
These facets demonstrate the critical relationship between proper alignment and the successful implementation of how to put a tracer unit on an airsoft gun. When bore axis concordance, thread engagement uniformity, and light source trajectory alignment are accurately achieved, the tracer unit functions as intended, enhancing gameplay through improved visibility and accuracy. Conversely, when misalignment is present, the potential benefits of the tracer unit are undermined.
Frequently Asked Questions
The following questions address common inquiries regarding the installation and usage of tracer units on airsoft guns. The answers provide information aimed at optimizing the user experience and resolving potential issues.
Question 1: What tools are required for installing a tracer unit?
Generally, no specialized tools are necessary for installing a tracer unit. The process primarily involves threading the unit onto the airsoft gun’s barrel. However, a soft cloth may be useful for gripping the unit and barrel for secure tightening. In some cases, a small wrench may be needed if the unit features a set screw for added security. Forceful tightening is not recommended, as it can damage threads.
Question 2: How does one determine if a tracer unit is compatible with a specific airsoft gun?
Compatibility is primarily determined by the threading of the airsoft gun’s outer barrel. Common thread types include 14mm clockwise (CW) and 14mm counter-clockwise (CCW). The tracer unit must have matching threading to ensure proper attachment. Information regarding barrel threading is usually available in the airsoft gun’s specifications or from the manufacturer. Adapters are available, if necessary, for adapting different thread types.
Question 3: What types of tracer BBs are compatible with tracer units?
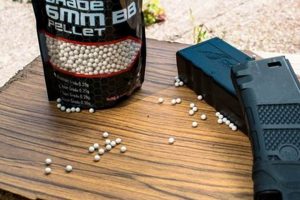
Tracer units require the use of specialized tracer BBs, which are manufactured with a phosphorescent coating. This coating absorbs the UV light emitted by the tracer unit, causing the BBs to glow in flight. Standard BBs will not illuminate when used with a tracer unit.
Question 4: How does temperature affect the performance of tracer units and tracer BBs?
Extreme temperatures can negatively impact the performance of both tracer units and tracer BBs. Cold temperatures may reduce battery life and decrease the intensity of the UV light emitted by the unit. High temperatures can potentially degrade the phosphorescent coating on tracer BBs, reducing their luminosity. It is recommended to store both the unit and the BBs within a moderate temperature range.
Question 5: How often should the batteries in a tracer unit be replaced or recharged?
The frequency of battery replacement or recharging depends on several factors, including battery type, usage intensity, and ambient temperature. Lithium-ion batteries, commonly used in tracer units, typically offer longer run times than alkaline batteries. It is advisable to monitor the brightness of the tracer BBs and replace or recharge the batteries when the illumination begins to noticeably dim.
Question 6: What maintenance is required to keep a tracer unit functioning properly?
Regular maintenance involves cleaning the lens of the UV light source with a soft, dry cloth to remove dirt and debris. Also, inspect the threads for damage. The battery compartment should be checked periodically for corrosion or damage. Storing the tracer unit in a dry environment when not in use can prolong its lifespan.
In summary, proper installation, compatibility checks, and regular maintenance are crucial for optimal tracer unit performance.
The subsequent section will delve into advanced troubleshooting techniques for tracer unit malfunctions.
Conclusion
The preceding discussion has comprehensively addressed “how to put a tracer unit on an airsoft gun,” encompassing critical aspects from thread compatibility to operational testing. Emphasis has been placed on the importance of secure attachment, correct battery installation, and proper alignment to ensure optimal functionality. Adherence to the guidelines presented maximizes the benefits of tracer technology in low-light airsoft environments. Neglecting these considerations can compromise performance and potentially damage equipment.
The information provided equips users with the knowledge to effectively install and maintain tracer units, thereby enhancing their airsoft experience. Further research and meticulous application of these principles will contribute to both improved individual performance and a heightened level of tactical gameplay. The investment in understanding “how to put a tracer unit on an airsoft gun” ultimately translates to a more rewarding and competitive engagement in the sport.


