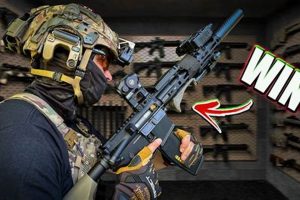
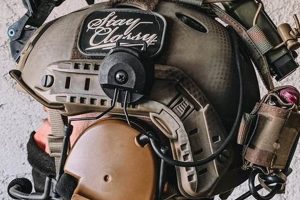
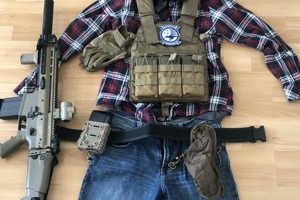
The specific configuration of gear and equipment employed by airsoft players, mirroring the aesthetic and functional load-bearing setups seen in the video game “The Division,” is a popular theme within the airsoft community. This often involves selecting tactical clothing, plate carriers, pouches, and replica firearms to emulate the visual style of agents from that game. A typical example includes a backpack containing water, spare magazines, and a tactical radio, coupled with a modular chest rig offering rapid access to ammunition.
The appeal of these themed setups lies in their combination of aesthetic distinctiveness and practical utility. Replicating a recognizable visual identity from a popular game offers a sense of immersion and allows players to express their interest in the source material. Furthermore, the emphasis on functional gear, informed by realistic military and law enforcement practices, lends itself to effective performance during airsoft engagements. The trend has evolved over time, influenced by new game releases and developments in real-world tactical equipment.
Understanding the components and principles behind constructing these themed sets is essential for players looking to participate in this aspect of the sport. The following sections will detail crucial considerations, including clothing selection, gear configuration, firearm choices, and strategies for optimizing performance while maintaining the desired aesthetic.
Tips for Optimizing a Division Airsoft Loadout
The following guidelines offer practical advice for constructing a functional and aesthetically accurate recreation, drawing inspiration from the tactical gear and equipment featured in “The Division” video game series.
Tip 1: Prioritize Functionality Over Pure Aesthetics: While replicating the visual appearance is important, ensure gear choices support effective airsoft gameplay. Select pouches and carriers designed for quick magazine changes and comfortable maneuvering.
Tip 2: Choose Apparel with Durability and Camouflage in Mind: Opt for tactical pants and shirts made from ripstop fabrics that offer both durability and appropriate concealment for the intended environment. Consider color schemes like Ranger Green or Multicam for versatility.
Tip 3: Select a Plate Carrier That Offers Modularity: A plate carrier with MOLLE webbing allows for flexible attachment of pouches and accessories. Choose a model that fits comfortably and accommodates ballistic plate replicas, if desired for realism.
Tip 4: Incorporate a Backpack with Ample Storage Capacity: A backpack offers convenient storage for essential items such as water, spare batteries, and tools. Select a model with a comfortable harness system for extended use during gameplay.
Tip 5: Utilize a Replica Firearm That Matches the In-Game Counterparts: Research the specific weapons used by agents in “The Division” and choose airsoft replicas that closely resemble those models. Consider factors such as weight, ergonomics, and magazine compatibility.
Tip 6: Implement a Communication System: A tactical radio with a push-to-talk headset enables clear communication with teammates. Choose a radio with sufficient range and durability for the playing environment.
Tip 7: Prioritize Eye Protection: Investing in high-quality, ANSI-rated eye protection is paramount for safety. Select goggles or a full-face mask that provides a secure fit and clear vision.
Following these tips ensures a balance between authentic visual representation and practical performance, maximizing effectiveness and enjoyment during airsoft activities.
The subsequent section will examine specific gear recommendations and vendors known for supplying components suitable for achieving a credible themed set.
1. Apparel Color
Apparel color constitutes a fundamental element in the visual and practical composition of a “division airsoft loadout”. The selection of appropriate colors not only contributes to an accurate replication of the source material but also impacts concealment and operational effectiveness in the airsoft environment.
- Ranger Green: Versatility and Practicality
Ranger Green emerges as a prevalent choice due to its adaptability across diverse environments. Its muted tone offers effective concealment in woodland and urban settings, mirroring the operational versatility of agents within “The Division”. The color’s widespread use in military and law enforcement further enhances the authenticity of the loadout.
- Multicam: Environmental Adaptability
Multicam, a multi-environment camouflage pattern, provides superior concealment across a broader spectrum of terrains compared to solid colors. Its complex pattern disrupts the wearer’s silhouette, making it harder to detect in varying light conditions and foliage. This adaptability is particularly beneficial in dynamic airsoft scenarios that encompass different environments.
- Solid Colors: Uniformity and Tactical Impression
While camouflage patterns prioritize concealment, solid colors, such as black or gray, offer a more uniform and identifiable appearance. This can be advantageous in certain team-based scenarios where visual cohesion is desired. However, the lack of inherent camouflage necessitates careful consideration of the operating environment.
- Color Coordination: Maintaining Realism and Visual Harmony
Achieving visual harmony within the loadout requires careful coordination of apparel color with other gear elements, such as plate carriers and pouches. Employing complementary colors or subtle variations within a consistent color palette enhances the overall aesthetic cohesiveness, contributing to a more credible and visually appealing impression.
The judicious selection of apparel color represents a critical step in establishing a convincing “division airsoft loadout”. The chosen color significantly influences both the visual impact and the functional effectiveness of the overall setup, directly impacting the player’s immersion and performance during airsoft engagements. Consideration of the operational environment and the desired aesthetic is paramount in making an informed decision.
2. Plate Carrier Type
The plate carrier forms the core of any tactical loadout, and its selection is particularly critical for achieving a credible recreation inspired by “The Division.” The type of carrier chosen directly influences the overall aesthetic, load-bearing capacity, and functional utility within airsoft scenarios.
- JPC (Jumpable Plate Carrier) Style
JPC-style carriers are lightweight and minimalist, prioritizing mobility and breathability. Their streamlined design, often featuring MOLLE webbing for modular attachment, aligns with the agile and responsive nature of agents depicted in “The Division.” Replica JPCs made of durable nylon are common choices, allowing for customization without excessive bulk.
- AVS (Adaptive Vest System) Style
AVS-style carriers offer greater modularity and scalability. Their component-based design allows users to adapt the vest to specific mission requirements, adding or removing pouches, panels, and other accessories as needed. This flexibility mirrors the adaptive nature of agents in “The Division,” who frequently modify their gear loadouts based on the mission parameters. AVS replicas often feature detachable front panels, cummerbunds, and shoulder pads.
- CPC (Crye Precision Cage Plate Carrier) Style
CPC-style carriers provide a balance of protection, comfort, and load-bearing capability. Their ergonomic design and integrated padding enhance user comfort during extended wear, while their robust construction ensures durability in demanding environments. Replicas of CPC carriers are favored for their realistic appearance and ability to accommodate heavier loads, reflecting the agents’ need for sustained operational effectiveness.
- Chest Rig Alternatives
While not technically plate carriers, chest rigs offer a lightweight and streamlined alternative, particularly for players prioritizing mobility and minimal bulk. Chest rigs provide ample space for carrying magazines and essential gear, while reducing the overall weight and profile of the loadout. These are less common for direct replications, but can be viable for “inspired by” builds.
Ultimately, the selection of a specific plate carrier type depends on the player’s individual preferences, budget, and desired level of aesthetic accuracy. Balancing visual authenticity with functional practicality is essential for constructing a “division airsoft loadout” that not only looks the part but also enhances performance during airsoft engagements.
3. Pouch Configuration
The organization and arrangement of pouches on a plate carrier or chest rig represent a crucial aspect of a “division airsoft loadout.” Pouch configuration directly impacts the efficiency of gear access, influencing reload speeds, medical supply retrieval, and overall tactical effectiveness. An ill-considered configuration can hinder movement, create unnecessary bulk, and increase response times in critical situations. For instance, a typical configuration might include magazine pouches readily accessible on the dominant hand side, a medical pouch centrally located for ambidextrous access, and a utility pouch positioned for less frequent use items. The choice of pouch types open-top, zippered, or hook-and-loop closure also affects ease of access and security. The configuration is not merely aesthetic; it directly influences the operator’s ability to perform essential tasks during an airsoft engagement.
Practical application of optimal pouch configuration involves careful consideration of individual needs and playing style. A player who prefers a high-speed, aggressive style may opt for minimalist configurations with readily accessible magazine pouches, while a support role player might prioritize carrying more ammunition and additional utility items. The arrangement should facilitate intuitive and reflexive movements, minimizing the need to visually confirm pouch locations. Real-world military and law enforcement practices often inform effective pouch configurations, with adaptations made to suit the specific constraints and objectives of airsoft gameplay. A properly configured setup balances accessibility with security, preventing accidental loss of gear while allowing for rapid deployment when needed.
In summary, the arrangement of pouches is not simply a cosmetic element of a “division airsoft loadout.” It is an integral component that influences speed, efficiency, and overall performance. Challenges arise in balancing authenticity with practicality, as replicating in-game loadouts may necessitate compromises in ergonomic design. Ultimately, a well-designed pouch configuration is tailored to the individual player’s needs, enhancing their ability to execute tactical maneuvers and contribute effectively to the team’s objectives, making the loadout as functional as it is visually compelling.
4. Firearm Replica
The selection of a firearm replica is a central element in constructing a credible “division airsoft loadout.” The firearm serves as a primary visual indicator of the intended theme and significantly influences the loadout’s overall effectiveness in gameplay.
- Aesthetic Authenticity
Firearm selection profoundly impacts the visual credibility of the loadout. Replicas of firearms prominently featured in “The Division” game, such as M4 variants, MP5s, or tactical shotguns, directly enhance the aesthetic fidelity. This selection necessitates attention to detail, including replicating attachments like optics, foregrips, and suppressors that mirror in-game configurations. The replica should accurately represent the real-world counterpart in terms of dimensions, markings, and overall design.
- Performance Characteristics
Beyond aesthetics, the airsoft replica’s performance characteristics are crucial. Factors such as rate of fire, accuracy, range, and magazine capacity influence effectiveness during gameplay. Replicas should be chosen that not only resemble the in-game firearms but also provide a competitive advantage in airsoft scenarios. Upgrade components, such as improved hop-up units or high-torque motors, can enhance performance.
- Ergonomics and Handling
The ergonomics and handling characteristics of the firearm replica influence user comfort and control. Factors such as weight, balance, and grip design impact the player’s ability to maneuver and engage targets effectively. Replicas should be selected that fit comfortably in the user’s hands and allow for intuitive manipulation. Aftermarket accessories, such as ergonomic grips or adjustable stocks, can further improve handling.
- Regulatory Compliance
Adherence to local regulations governing airsoft replicas is essential. This includes ensuring that the replica complies with velocity restrictions, marking requirements, and ownership laws. Responsible firearm replica ownership promotes safety and prevents legal complications. Players should be aware of and comply with all applicable laws and regulations in their area.
The selection of a firearm replica for a “division airsoft loadout” necessitates a balance between aesthetic accuracy, performance capabilities, ergonomic considerations, and legal compliance. The firearm is not merely a prop but a functional tool that contributes to both the visual appeal and the practical effectiveness of the overall setup. Careful consideration of these factors is crucial for constructing a loadout that is both credible and competitive.
5. Backpack Selection
The selection of a backpack is a significant consideration in assembling a “division airsoft loadout,” extending beyond mere aesthetic replication. It represents a functional element essential for carrying mission-critical supplies, influencing the player’s sustained operational capability and logistical support during airsoft engagements.
- Capacity and Organization
Backpack capacity dictates the amount of gear a player can carry, including spare magazines, hydration systems, tools, and medical supplies. Internal organization, such as compartments and dividers, facilitates efficient gear management and rapid access. The choice of capacity should align with the anticipated duration and intensity of gameplay, ensuring adequate support without undue encumbrance. Larger packs may suit support roles, while smaller, streamlined options serve more agile players.
- Ergonomics and Comfort
Backpack ergonomics influence user comfort and reduce fatigue during extended use. Padded shoulder straps, adjustable torso lengths, and waist belts distribute weight evenly, minimizing strain on the back and shoulders. Breathable materials enhance ventilation, reducing perspiration and discomfort. A well-designed backpack allows players to maintain mobility and focus on the objective, rather than being distracted by discomfort.
- Durability and Materials
The durability of a backpack is critical for withstanding the rigors of airsoft environments. Reinforced stitching, rugged fabrics (such as Cordura nylon), and durable zippers ensure longevity and resistance to wear and tear. Water-resistant or waterproof materials protect sensitive equipment from inclement weather, maintaining operational readiness in adverse conditions. A robust backpack minimizes the risk of gear damage or loss during intense gameplay.
- Aesthetic Authenticity
While functionality is paramount, the backpack’s aesthetic contribution to the “division airsoft loadout” cannot be ignored. Selecting a backpack model that closely resembles those used by agents in “The Division” enhances the overall visual fidelity of the setup. Color, design, and the presence of MOLLE webbing for attaching additional pouches all contribute to the backpack’s aesthetic congruity with the intended theme.
The multifaceted role of backpack selection within a “division airsoft loadout” underscores the importance of balancing practical utility with visual accuracy. A properly chosen backpack not only facilitates logistical support but also contributes to the immersive experience and overall effectiveness of the player’s setup. The selection process requires careful consideration of capacity, ergonomics, durability, and aesthetic alignment to achieve an optimal configuration.
6. Communication System
The integration of a communication system within a “division airsoft loadout” transcends mere aesthetic replication, serving as a critical determinant of tactical effectiveness. The ability to coordinate movements, relay enemy positions, and execute strategic maneuvers is significantly enhanced by reliable communication. Without such a system, the “division airsoft loadout,” regardless of its visual fidelity, becomes functionally impaired, reducing the player’s contribution to team objectives. For example, a squad attempting to secure a building benefits immensely from real-time communication regarding enemy locations and movement patterns, enabling coordinated breaches and minimizing casualties. The absence of this communication can lead to fragmented efforts and increased vulnerability.
The practical application of a communication system extends beyond basic voice transmission. Pre-planned communication protocols, such as using designated codewords for specific scenarios or establishing clear command structures, can streamline information flow and reduce ambiguity during intense engagements. Furthermore, advanced communication systems featuring noise-canceling headsets and secure channels can enhance clarity and prevent eavesdropping. These features become particularly valuable in environments with high levels of ambient noise or when operating in proximity to opposing teams. A team equipped with a well-defined communication protocol and reliable equipment possesses a distinct advantage over opponents relying solely on visual cues or fragmented communication.
Effective communication in airsoft requires more than just equipment; it demands disciplined usage and adherence to established protocols. Challenges include maintaining clear communication in stressful situations, managing radio chatter, and adapting to equipment limitations. A comprehensive understanding of the communication system’s capabilities, coupled with rigorous training in its application, is essential for maximizing its potential. The strategic deployment of a communication system, therefore, represents a cornerstone of effective teamwork and tactical success within a “division airsoft loadout,” linking individual capabilities to collective objectives, thereby fostering a cohesive and adaptable team.
7. Eye Protection
Eye protection constitutes an indispensable component of any “division airsoft loadout,” serving as the primary safeguard against projectile impacts. The high-velocity BBs used in airsoft present a significant risk of ocular injury, potentially leading to vision impairment or blindness. Therefore, the selection of appropriate eye protection is not merely an accessory choice but a fundamental safety requirement. For instance, a “division airsoft loadout” replicating a specific agent’s gear should prioritize ballistic-rated goggles or a full-face mask over aesthetically similar but non-compliant eyewear. The cause-and-effect relationship is direct: inadequate eye protection results in a heightened risk of injury, directly compromising the player’s safety and ability to participate in the activity.
The practical significance of this understanding extends to the types of eye protection employed. ANSI Z87.1-rated goggles or full-face masks provide a verifiable level of impact resistance, ensuring that the eyewear can withstand the forces generated by airsoft projectiles. Mesh goggles, while offering ventilation, may not provide sufficient protection against small BB fragments or shatter under high-impact forces, rendering them unsuitable for airsoft use. Proper fit is also crucial; ill-fitting eye protection can shift during gameplay, exposing the eyes to potential impacts. The selection process, therefore, involves verifying the safety rating, ensuring proper fit, and considering factors such as anti-fog coating to maintain clear vision during strenuous activity.
In summary, the integration of compliant eye protection into a “division airsoft loadout” represents a non-negotiable safety imperative. Challenges may arise in balancing aesthetic considerations with safety standards, particularly when replicating specific in-game looks that may not prioritize eye protection. However, the potential consequences of ocular injury far outweigh any aesthetic compromises. Emphasizing the importance of ANSI Z87.1-rated eye protection reinforces the broader theme of responsible airsoft participation, promoting safety and ensuring that players can enjoy the activity without incurring unnecessary risks.
Frequently Asked Questions
This section addresses common inquiries and clarifies key considerations regarding the assembly and implementation of airsoft equipment configurations inspired by the “Division” video game series.
Question 1: What constitutes a “division airsoft loadout?”
It encompasses a specific combination of tactical gear, apparel, and replica firearms intended to replicate the aesthetic and functional load-bearing setups observed in “The Division.” These configurations typically include tactical clothing, plate carriers, pouches, replica firearms, and associated accessories designed to mirror the visual style of agents from the game.
Question 2: Is strict adherence to in-game equipment configurations essential?
While replicating the visual appearance is a primary objective, strict adherence is not mandatory. Practicality and functionality should also be prioritized to ensure effective performance during airsoft engagements. Compromises may be necessary to accommodate personal preferences, budget constraints, or regulatory requirements.
Question 3: What safety standards should be observed when assembling a “division airsoft loadout?”
Eye protection conforming to ANSI Z87.1 standards is paramount. Replica firearms must comply with all applicable local regulations regarding velocity limits, marking requirements, and ownership laws. Safe handling practices and responsible airsoft participation are essential.
Question 4: What is the typical budget range for constructing a functional loadout?
The budget range varies significantly depending on the quality of components, brand reputation, and inclusion of accessories. A basic functional loadout can be assembled for several hundred dollars, while more elaborate and high-end configurations may exceed one thousand dollars. Researching reputable brands and comparing prices is recommended.
Question 5: How does apparel color selection impact the overall effectiveness of the loadout?
Apparel color influences camouflage effectiveness and visual authenticity. Ranger Green and Multicam are versatile choices for various environments. Solid colors, such as black or gray, may offer a more uniform appearance. Color coordination with other gear elements enhances aesthetic cohesiveness.
Question 6: Is prior experience with airsoft necessary before assembling a “division airsoft loadout?”
While not strictly required, prior experience with airsoft is beneficial. Familiarity with tactical gear, firearm operation, and airsoft gameplay enhances the ability to select appropriate equipment and configure it effectively. Consulting with experienced players or attending introductory airsoft events is advisable for newcomers.
In conclusion, constructing an effective and visually credible “division airsoft loadout” requires balancing aesthetic considerations with practical functionality and adherence to safety standards. Careful planning, informed gear selection, and responsible airsoft practices are essential for a successful outcome.
The subsequent section will address specific vendor recommendations and resources for acquiring components suitable for completing a “division airsoft loadout.”
Division Airsoft Loadout
The preceding analysis has explored the multifaceted nature of the “division airsoft loadout,” encompassing considerations of aesthetic accuracy, functional performance, safety protocols, and regulatory compliance. Constructing such a configuration demands a comprehensive understanding of tactical gear, firearm replicas, and the principles of effective load-bearing. The selection of components, ranging from apparel color to eye protection, directly influences the player’s capabilities and the overall credibility of the replication.
The “division airsoft loadout” represents more than a mere collection of equipment; it signifies a commitment to tactical simulation and responsible participation in the airsoft community. Continued adherence to safety standards, regulatory requirements, and ethical gameplay practices is paramount. Further research, ongoing training, and the sharing of knowledge will contribute to the evolution and refinement of these specialized configurations, ensuring both realism and operational effectiveness on the field.


![[Seal Team Six Inspired] DEVGRU Airsoft Loadout Guide + Setup Tips Ultimate Airsoft Guide for Beginners, Tactics & Gear Reviews [Seal Team Six Inspired] DEVGRU Airsoft Loadout Guide + Setup Tips | Ultimate Airsoft Guide for Beginners, Tactics & Gear Reviews](https://airsoftica.com/wp-content/uploads/2025/12/th-735-300x200.jpg)


![Build Your Realistic Army Ranger Airsoft Loadout [Guide] Ultimate Airsoft Guide for Beginners, Tactics & Gear Reviews Build Your Realistic Army Ranger Airsoft Loadout [Guide] | Ultimate Airsoft Guide for Beginners, Tactics & Gear Reviews](https://airsoftica.com/wp-content/uploads/2025/12/th-651-300x200.jpg)